Showing posts with label Pinkfresh Studio. Show all posts

July 24, 2026

Jolly Snowman

Hello there.  It's still Christmas in July, and I have a CAS (clean and simple) Christmas card to share using an oldie, but goodie stamp from Purple Onion Designs (POD).   For those not familiar with this cutie, meet Jolly (snowman looking up).  


Jolly was stamped with Memento Tuxedo Black ink on X-Press It paper, coloured with Copic Sketch markers then masked.  Ink blended Water Hyacinth fresh dye ink from Altenew (ALT) then die cut the panel down with the Blanket Stitched Rectangle from Pinkfresh Studio (PFS) for a decorative edge.  

Copic markers used:
carrot nose - YR12/16/23/27, E08 
scarf/pocket - B60/63/66 
twig arms - E31/25/29 
buttons - N7 
snow/shading - B0000/000/00, C00/0/1


And I couldn't think of a more appropriate greeting wish (retired Poppy Stamps) from Jolly. 😉  It was black heat embossed using Versafine Onyx Black ink and clear glitter embossing powder for a bit of sparkle.  Adhered the panel onto a white card base then added falling snow with a white gel pen to finish. 

Please note compensated affiliate links are used in this post at no extra cost to you should you make a purchase through them.  I appreciate your support.  Thank you for stopping by. 


Challenges:
Simply Clean & Simple - AG CAS + optional Birthday (creative licence - Jesus' birthday? 😁)

May 01, 2023

Guest Designer for Colorful Options May 2023 Challenge - Blue

Hello everyone.  After being named the Designer Spotlight winner in March, I am so excited to be invited to guest design (GD) this month at Colorful Options (CO) for their May challenge, especially since this month’s colour is BLUE.  For those who may not know, blue is my favourite colour! 😉   Of course, if blue isn’t yours, you can always create a rainbow colour themed project instead to play along.  Here’s this month’s inspiration board.


And here’s my bright, blue birthday card.


Used a balloon die from Simon Says Stamp to die cut the balloons from white cardstock.  Blended Tumbled Glass, Mermaid Lagoon and Blueprint Sketch distress oxide inks (DOx) to colour them.  To give them dimension, made sure to leave a highlight spot.  Leftover ink from a black foam blending tool was used to add shading to the white balloons.


Took the Blanket Stitched Rectangle die from Pinkfresh Studio next to die cut an A2 size panel from light blue cardstock.  Arranged and adhered the balloons onto the upper 2/3 of the panel.  Splattered with diluted white gouache paint for a festive confetti look.  Die cut the Birthday Trio sentiment from Gina K Designs twice from thick white paper and stacked them together for dimension.  Assembled the card onto a white card base to finish.


I want to thank Makira and the CO team for having me guest.  For more inspirations from the CO design team and/or to link up your project, click HERE.  Hope to see you in the gallery.  Thank you for stopping by.


Challenges:
The Paper Players - #638 Tic-Tac-Toe Challenge from Anne Marie (diagonal: bright colors, die cuts, birthday)

April 12, 2023

Guest Designer for Time Out Challenge #236 - World Book Day


Hello everyone.  I’m excited to be guest designing this fortnight at Time Out (TO) for their challenge #236 in celebration of World Book Day.  The challenge theme is You Are a Reader.


With Newton’s Nook Designs sponsoring the challenge (with a $25 gift code to their store), it was the perfect time to finally ink up Newton’s Book Club stamp set that I’ve had for many years now to create this CAS (clean and simple) card.


Started by die cutting alcohol marker friendly cardstock with the Blanket Stitched Rectangle die from Pinkfresh Studio.  Stamped the image and sentiment onto the panel with Memento Tuxedo Black ink.  Masked the image, and blended light gray dye ink over a Brick Pattern stencil from Whimsy Stamps for the background.


Removed the mask and coloured the image with a few light cool grey and numerous pink Copic Sketch markers for a pink and grey colour palette.  Mounted the panel onto a white card base then added a few clear sequins to finish.


I want to thank Stephanie and the TO challenge team for having me as their guest.  For more inspirations, the challenge details/rules and/or to link up your entry, click HERE.  Thank you for stopping by. 


Challenges:
Crafty Animals - April: AG Animals (unable to leave comments)

August 03, 2022

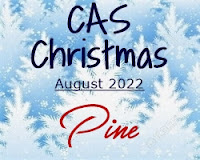
CAS Christmas August Challenge - Pine

 Hello everyone.  The August challenge at CAS Christmas starts now and this month’s prompt is PINE.


Using newWintry Forest layering stencils from Pinkfresh Stufio, I created a forest of pine trees.


There are six stencils in the set, and all together it covers an A2 size card front perfectly.  To keep my card CAS (clean and simple) though, I used only stencils 3-5 and started about halfway up on the card.  Took a Bristol stitched panel from my stash and with a blender brush, ink blended Salvaged Patina distress ink over the stencils.  Increased the amount of ink applied with each stencil to get an ombré look.


Splattered with white gouache paint for snow.  Once completely dry, stamped the sentiment (retired) with Versafine Onyx Black ink and heat embossed with clear glitter embossing powder.  Mounted it onto a white card base to finish.


Easy-peasy.  And you’re in for a treat this month as we have not one, but two guest designers joining us.  You can see what Elizabeth (Paper Sweetness) and Lucie (Lucie G Cards) have created, along with the design team, over on the challenge post HERE. Thank you for dropping by.


June 27, 2022

Roses for Loll

Hello there.  It’s a special day for my crafty friend, Loll, because it’s her birthday! 🎉🎁🛍🎂🎈  Using new Roses stamp set from Reverse Confetti and knowing she loves pink, I created this.


Stamped the image on alcohol marker friendly cardstock with Memento Tuxedo Black ink, then coloured it in bright colours with Copic Sketch markers.  For some detailing, die cut it with the Blanket Stitched Rectangle die from Pinkfresh Studio.


The sentiment from the same set was then stamped with Versafine Onyx Black ink and heat embossed with clear glitter embossing powder.  Embellished it with some pink Bright Jewels from Memory Box to finish.


Happy birthday, Loll!  Hope you have a fabulous day.  Thank you for dropping by.


Challenges:
NBUS #39 - new stamp


March 13, 2022

Another Card for Ukraine

Hello there.  My heart continues to break 💔 for the people of Ukraine.  How can a war be happening in this time and age right in front of our eyes!?  Today, I keep supporting Ukraine with another symbolic card.  After heat embossing the sentiment from Butterfly Blossoms by Reverse Confetti (RC) on my first card for Ukraine HERE, I couldn’t put off colouring up that beautiful floral butterfly in the set.  Here’s my second card for Ukraine.

Stamped the butterfly image with Memento Tuxedo Black ink on a panel die cut from XPress It cardstock using Pinkfresh Studio Blanket Stitched Rectangle die, then coloured with Copic Sketch markers.

Blues - B28. BF2, B12, B04, B01, B0000
Yellows - YR27, YR24, Y08, Y02, Y000
Black - 100
White gel pen for doodling details.

I was about to create a mask for the butterfly to do some ink blending for the background, but then decided to channel the inspiring colourist Alberto (@loshakeratoalberto) and colour a faux watercolour bloom instead.  Nowhere close to his masterful work, but at least I finally tried it. 😆 


Next, Prize Ribbon distress ink and Catherine Pooler Something Borrowed ink were ombré ink blended onto a scrap of Bristol paper using blender brushes.  For some sparkle, covered the piece with VersaMark ink and heat embossed with clear glitter embossing powder before diecutting the letters from it with new/unused RC Letter Cuts.  Each letter was then die cut two more times from thick white paper to stack for dimension.  Clear Jewels from Memory Box were added to the flower centres to finish.


In solidarity with Ukraine. 🇺🇦   Thank you for dropping by.


NBUS #36 - new letter dies 

February 28, 2022

Let It Snow

Hello there.  It’s the last day of February and I finally found my new/unused Let It Snow die from Lawn Fawn just in time to squeak in under the wire for some challenges.  This was super quick and easy. 


The background is from my all-time favourite Blurry Flurries paper pack by Whimsy Stamps.  It was die cut with new/unused Blanket Stitched Rectangle die from Pinkfresh Studio to give it a decorative border.


The sentiment was die cut twice; once from a scrap of glossy white paper and the other from black cardstock to offset for a drop shadow.  Assembled the card onto a white card base to finish.  


Did I mention this was super quick? 😉  Thank you for stopping by. 


October 20, 2021

Butterfly Shaped Floral Birthday

Hello there.  I haven’t been feeling well as I’ve been fighting a cold.  Yes, a cold!  Being in a Covid pandemic for almost two years, does anyone remember the last time you had a cold? 😆   It’s been years for me!  Anyway, I dragged myself to the craft room today, determined to complete the card that I started on World Card Making Day (WCMD)! *lol*😂   I was also determined to use all new products, which I’m pleased to say I accomplished!  All stamps and dies used for my card were new.


I bought the Choose Hope floral stamp set from Pinkfresh Studio (PFS) as soon as it was released, and wouldn’t you know it, it sat in my drawer until WCMD. 🙈  So I dusted it off and inked it up with Memento Tuxedo Black ink.  Stamped it onto Xpress It cardstock then coloured it with Copic markers.  And that was all I had done on WCMD because I was waiting for the PFS Perfect Sentiments stamp and die sets to arrive to add to it and create a clean and simple (CAS) card.  


Well since then other challenges have popped up that I wanted to participate in, so I nixed the CAS card idea.  The Flower Challenge (TFC) is celebrating their 5th birthday (happy birthday TFC!) and is asking for us to use a shape.  Not sure if a butterfly shape is taking my creative licence too far, but I just received the PFS Butterflies die, and used it to die cut from the coloured floral image and from black cardstock.  Took the lightest colour Copic marker used in colouring the flowers and filled in the negative background space, then offset the two butterfly cutouts for a drop shadow.


Heat embossed the Perfect Sentiment on black cardstock with white embossing powder, then die cut out with the coordinating die.  Die cut two more from black cardstock to stack for dimension.  The Crackle Background stamp from Simon Says Stamp was stamped with Memento London Fog ink.  Assembled the card onto a white card base, then added clear shimmer on the flowers to finish.  Thank you for stopping by.


Challenges: