Showing posts with label mini slimline. Show all posts

May 21, 2022

Welcome Kai

Hello everyone.  Back in March, my brother was blessed with a new addition to his phamily.  And a couple months later 🙈, I finally completed this mini slimline card for my new nephew, Kai, using Adorable Elephants stamp set from My Favorite Things (MFT).


The elephants were stamped with Memento Tuxedo Black ink on a scrap of Xpress It cardstock, coloured with Copic Sketch markers, then fussy cut out.  Next, a mini slimline panel was die cut from Bristol paper using a Mini Slimline die from Spellbinders.  Ink blended Shabby Shutters distress ink (DI) for the ground and Salvaged Patina DI over a MFT Slimline Cloud Edges stencil for the sky.  Splattered with water and blot with a paper towel to soften the lines and give it texture. 


“Welcome” (retired Hero Arts) was stamped onto the panel with Archival Jet Black ink.  The MFT Impact Alphabet letters were die cut once from a scrap of Bristol paper and again from black cardstock.  Ombré coloured the Bristol letters with Prize Ribbon DI and a blender brush, then offset them with the black letters for a drop shadow.  Assembled the card onto a white card base measuring 3.25”x 6.25” to finish.

Kai will be the last baby for a while… until my nephews and nieces start having their own family.  Whoa!.. that sounded too crazy! 😆  Anyway, thank you for stopping in.  Have a wonderful day.


May 09, 2022

Stocking Stuffers

Hello everyone.  My Christmas card stash is lacking, so I took a break from florals and spring things to create a mini slimline Christmas card using new/unused (NBUS) stamp set from Pink and Main called Stocking Stuffers.


Stockings are synonymous with fireplace mantels, so that is the scene for my card.  To start, the puppy was stamped with Memento Tuxedo Black ink on Xpress It cardstock.  Masked him, then stamped the stocking.  Stamped the stocking again this time onto blue plaid paper from Memory Box Madras Plaid Blue and Violet paper.  Coloured the images with Copic Sketch markers then fussy cut out.  Fussy cut the plaid stocking next and paper pieced onto the coloured image.  For the garland, a few scraps of Bristol paper were ink smooshed with Stormy Sky distress oxide ink (DOx), then set aside to dry before die cutting them with Memory Box Pine Needle Trio dies.


To create the fireplace, a mini slimline panel was die cut from Bristol paper using NBUS Mini Slimline die from Spellbinders.  Added the stones by ink blending Antique Linen distress ink through NBUS Perfect Pool Wave stencil from My Favorite Things.  Love it when I can stretch my supplies.  Added shading to the stones using Copic Sketch marker E21 and splattered with white gouache paint for some texture.  The mantel piece was made by stacking a few pieces of thick white paper and scoring the top layer with my scoring tool.  The sentiment (retired) was heat embossed on black cardstock with white embossing powder before assembling the card onto a white 3.25”x6.25” card base to finish.


Since my Christmas card stash is low, I created another one with the kitty in the set.


Christmas cards are my favourite cards to make, so these were so fun for me.  And that does it for me today.  Thank you for stopping in.  Have a wonderful week,


Challenges:
Just Add Ink - #602 Choose Two (stencilling + heat embossing) 
NBUS #38 - new stamp, die and stencil 

April 01, 2022

Guest Designer for The Color Hues Challenge #38 - Pink and Green


Hello everyone.  I’m back this week with another guest designing (GD) post.  This time I’m thrilled to be joining the team at The Color Hues (TCH) for challenge #38 - Pink and Green. 


Of course it had to be April Fools today!  I could have sworn someone was playing a trick on me because it was quite the ordeal to create my card. 😂  I just received my order containing the gorgeous Rarest Rose stamp set from Gina K Designs and I was determined to use it right away.  After having to start over and then managing to save my second attempt, my mini slimline floral birthday card was finally done! 


The image was stamped with Memento Tuxedo Black ink on a mini slimline panel (3.25”x6.25”) trimmed from Xpress It cardstock.  This turned out more dramatic than I had planned, but to save my second card that had a green alcohol ink smear on it, I coloured the background black!  Colouring was done with Copic Sketch markers.  

Pinks - RV000, RV00, R81, R83, RV25
Greens - YG67, YG63, YG61 | BG05, YG06, YG03, YG01 | G28, YG17, YG07 
(hard to tell against the dark background, but with 3 different style leaves, I used 3 different blending combos)
Grays - C4, C2, C00 (for shading the white flowers) 
Black - 100


The sentiment from Waffle Flower Essential Sentiments was stamped with Hero Arts Unicorn white ink and heat embossed with white embossing powder.  Added clear shimmer to the pink flowers using a Spectrum Noir clear sparkle pen.  Embellished with some clear Raindrops from Studio Katia to finish.


I want to thank Nancy and TCH team for having me GD today.  To see the inspirations from the designers and/or link up your entry, click HERE.  Thank you for stopping by.  Have a wonderful day.


Challenges:


March 29, 2022

Guest Designer for ATSM #426 - Make Your Mark


Hello everyone.  I’m so excited to be guest designing (GD) at Addicted to Stamps and More (ATSM) today for their challenge #426 - Make Your Mark.


Tomorrow happens to be my eldest nephew’s birthday.  I have no clue how 22 years flew by so quickly!  So for my GD card, I used a few stamp sets from Gerda Steiner Designs (GSD) to create this fun mini slimline birthday card for him.


All images were stamped with Memento Tuxedo Black ink and coloured in with Copic Sketch markers.  Started by trimming a mini slimline panel (3.25”x6.25”) from Xpress It cardstock.  The floating puppy is from Howl Are You? Puppy and he was stamped first.  Masked him, then stamped the balloon from Lovely Panda.  For the wall, Shabby Shutters distress ink was blended on with a blender brush in the upper 2/3 of the panel.  Repeated the stamping steps for the two puppies below on a separate scrap piece of Xpress It cardstock, then fussy cut them out.  The left puppy, also from Howl Are You? Puppy, was stamped first, masked, then stamped the puppy in the gift bag from Christmas Puppies.  


The floor was created with new/unused Wood Floors die from Penny Black.  The wood floor section was die cut from Kraft cardstock, then coloured with Gathered Twigs distress ink and a foam blending tool.  The baseboard was die cut twice from a scrap of thick white cardstock and glued together to give it dimension.  The sentiment from Birthday Blowout by Poppy Stamps was heat embossed on black cardstock with white embossing powder.  Assembled the card onto a white 3.25”x6.25” card base, then added shading below the puppies on the floor and drew a bow on the tail with a fine black pen to finish.

This may be a little too cute for a 22 year old, but it’s fun, too. 😉 


I want to thank Kylie and the ATSM team for this GD opportunity.  For more inspirations from the design team and/or link up your own card to the gallery, please click HERE.  Thank you for stopping by.  Have a wonderful day.


Challenges:
NBUS #36 - new wood floor die

July 09, 2021

Spellbinders July Small Die of the Month

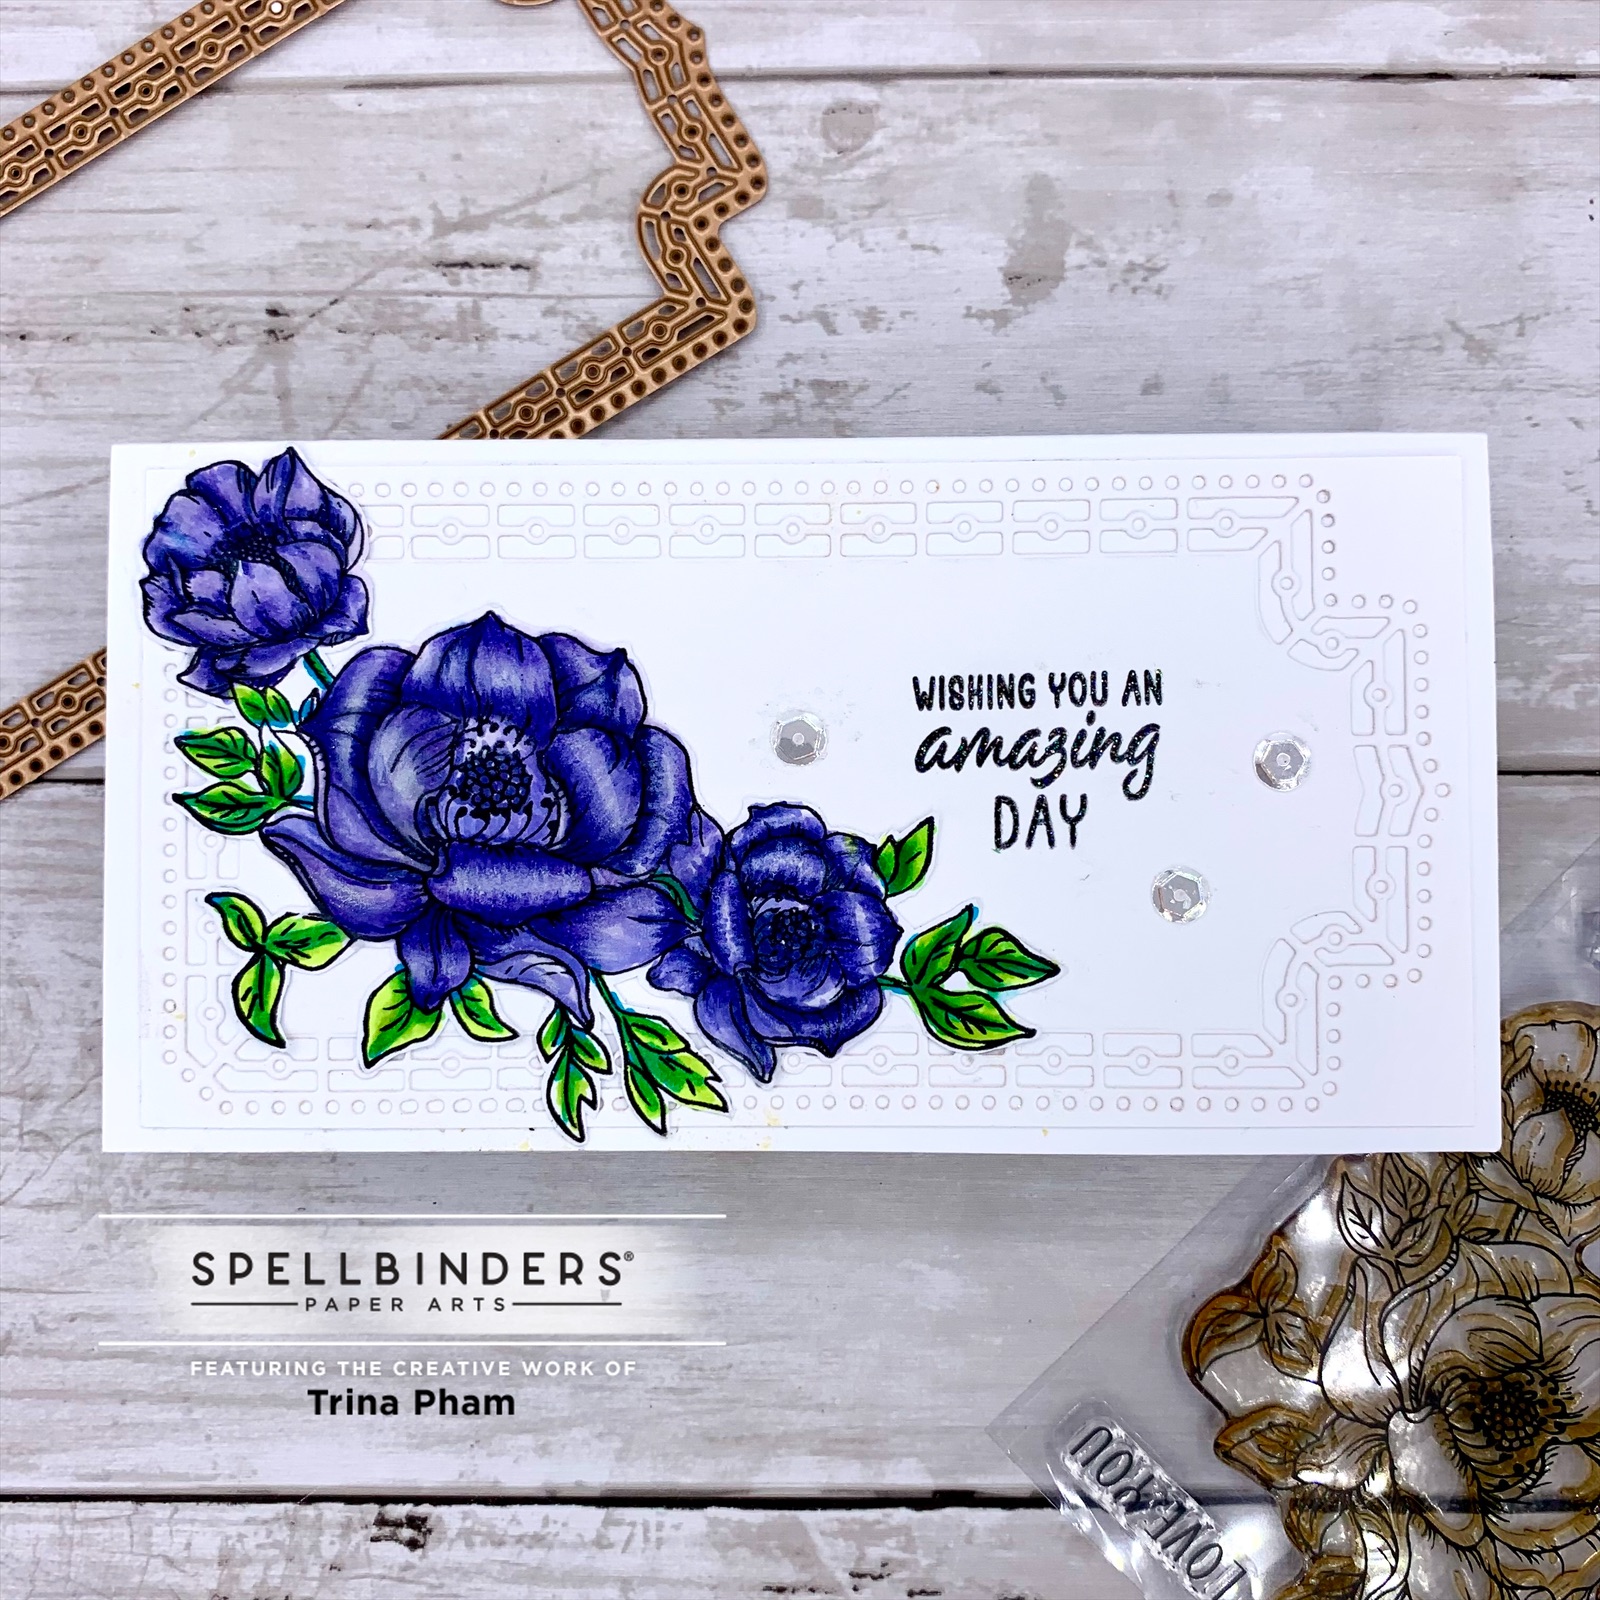
Hello everyone.  I’m dropping in today to share the July Spellbinders Small Die of the Month (SDOM).  This month’s Decorative Mini Slimline Card Creator die set contains 5 cutting dies.


As the name suggests, it can be used to make mini slimline cards.  Once again I’ve paired it with this month’s Sending Floral Wishes Clear Stamp of the Month (CSOM) to create a super easy clean and simple (CAS) card.

The largest die in the set measures 3.5”x6.5”, which is the same size as the mini slimline envelopes I have.  To ensure my card fits in these envelopes, the white card base is 6.25”x3.25”.  A piece of Bristol paper was then trimmed to 6”x3” and the second largest die was used to die cut from it, leaving a negative cut.


The floral image from the CSOM was stamped onto Xpress It cardstock with Memento Tuxedo Black ink, coloured in with Copic markers, then fussy cut out.  The sentiment from the same set was black heat embossed onto the Bristol panel.  Assembled onto the card base.  Added clear shimmer to the flowers and a few clear sequins for some sparkle to finish.

Had so much fun making this size card with these products that I made another CAS mini slimline card in portrait style this time.


Followed the same process as described above except… swapped out the stamped sentiment with a die-cut one from the SDOM.


There are several other monthly club kits offered by Spellbinders and you can check them out HERE.  This month’s kits are available now through July 24th.  Select past club kits may be available HERE.  Thank you for visiting.  Have a wonderful weekend.