Showing posts with label watercolor. Show all posts

December 18, 2022

Glimmering Just For You

Hello there.  I’m back today to share another birthday card created with the Glimmering Just For You floral hot foil plate from the Floral Reflection collection by Spellbinders (SB).  Foiling this floral spray and leaving it as is is simply beautiful (see this post)but it’s just as beautiful coloured, too. 


The floral spray and Diagonal Glimmer Stripes background were foiled on Bristol paper with Silver hot foil.  Watercoloured the image with Zig markers and a water brush, then die cut out with the matching die.  Die cut again from thick white paper to stack for dimension.


The sentiment from Essential Sentiments by Waffle Flower was stamped with VersaMark ink on Bristol paper, heat embossed with silver embossing powder, then die cut out with the matching die.  Assembled the card onto a white card base to finish.  With all that beautiful shine, didn’t think it needed embellishments. 


This was made for a crafty friend whose birthday is today.  Not sure if she received it yet, but hope she’s enjoying her special day.  Thank you for stopping by.  


SB products: *compensated affiliate links used at no extra cost to you… thank you for your support*


October 08, 2021

Spellbinders October Small Die of the Month

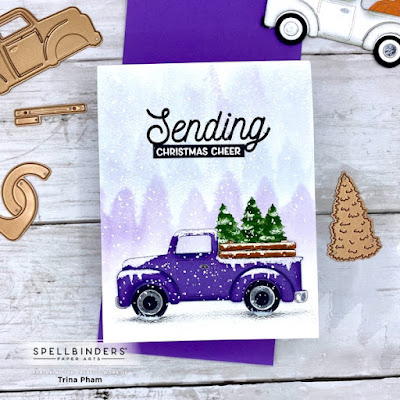
Hello there.  I’m back tonight to share the October Spellbinders Small Die of the Month (SDOM).  This Holiday Haul die set includes 14 dies.  It pairs perfectly with the October Clear Stamp of the Month (CSOM) to offer many options for a variety of occasions.


PLEASE NOTE: Affiliate links have been used where possible
at no extra cost to you when you purchase through these links.


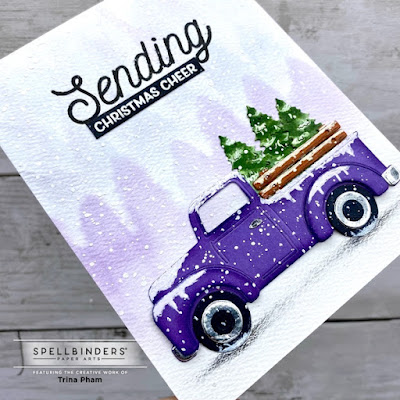
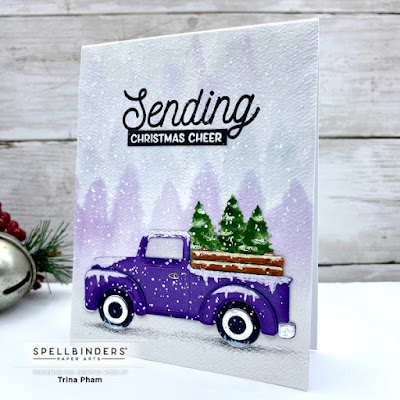
I don’t make fall cards very often, and since I love non-traditional colour Christmas cards, I used the fall Halloween colours from Butterfly Reflections Ink (BRI) October mood board to create a Christmas card.  I succeeded in the end, but once again, the orange colour stumped me for quite a while. 😂   I had so much fun making this card.


The truck body was die cut from Memory Box Twilight Purple paper pack.  The tire covers were die cut three times and stacked for dimension.  Shading was added to all the truck pieces with a detail blender tool and Dusty Concord distress ink (DI).  And now the orange... yes, the wood sideboards is die cut from orange paper in the Memory Box Sunny Orange paper pack and Gathered Twigs DI was applied to them to tone down the colour.  The tires were die cut from black cardstock and silver foil paper.  The bumpers were also die cut from silver foil paper.  Assembled the truck, then added piled up snow on it with a white gel pen.  


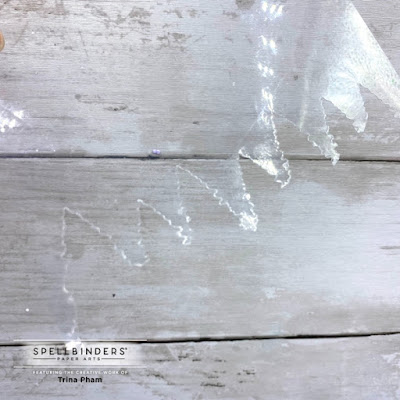
The trees were die cut three times from Xpress It cardstock and coloured with Copic markers.  Added snow to them with a white gel pen as well.  Was going to keep it clean and simple (CAS) and mount everything onto a card, stamp the sentiment and call it done… BUT I felt it needed something more.  So I stretched the tree die and die cut a tree line stencil from acetate.   


Used it with Dusty Concord and Chipped Sapphire DI to watercolor a wintry forest background on watercolor paper.  Dried the panel with the heat tool, then splattered with white gouache paint for snow.  Stamped “Sending” with Versafine Onyx Black ink directly onto the panel.  Heat embossed the rest of the sentiment onto black cardstock with white embossing powder.  Assembled the card onto a white card base, then added shading below the truck with a black Polychromos pencil to finish.


This month Spellbinders offered a new CSOM and Die category, but it sold out.  The stamp on its own is still available though.  To avoid disappointment in the future, make sure to sign up as soon as it is available next month.  All club kits seen HERE are available through October 24.  Past club kits may be available HERE.  Thank you for dropping by and joining me.  


Challenges:

May 09, 2021

Mother’s Day Peony

Hello and happy Mother’s Day to all the moms, grandmas and mother figures.  One of my many favourite flowers is the peony, and after years of it collecting dust in my drawer, I finally pulled out the Peony Duo stamp set by The Ton Stamps to create my mom’s Mother’s Day card.  No surprise blue is my favourite colour... BUT it turns out, it’s my mom’s favourite colour, too!  Bonus! 😂

So the peony and leaves were stamped with VersaMark ink onto hot press watercolor paper and heat embossed with Wow! Silver Pearl embossing powder.  Watercoloured them with Karin PRO Brushmarkers, then fussy cut them out (there are coordinating dies, which I don’t have). 


Next, a piece of Bristol paper was dry embossed with a new 3D embossing folder from Altenew called Rows of Squares.  White heat embossed the sentiment from the same stamp set on black cardstock, then assembled the card onto a white card base.  Added clear shimmer to the peony and a few jewel rhinestones for some sparkle to finish.  


With my dad’s recent passing two weeks ago, I really wish I could be there in person today to spoil my mom.  I may be bias, but my mom’s pretty amazing!  Hope she is enjoying her day.  Thank you for dropping by.  Enjoy your day.


Challenges:

April 03, 2021

CAS Christmas April Challenge - Rainbow

Hello everyone!  Long time since my last post, but I’m back today with the new challenge at CAS Christmas.  This month we’re brightening up the gallery with clean and simple (CAS) Rainbow Christmas cards. 


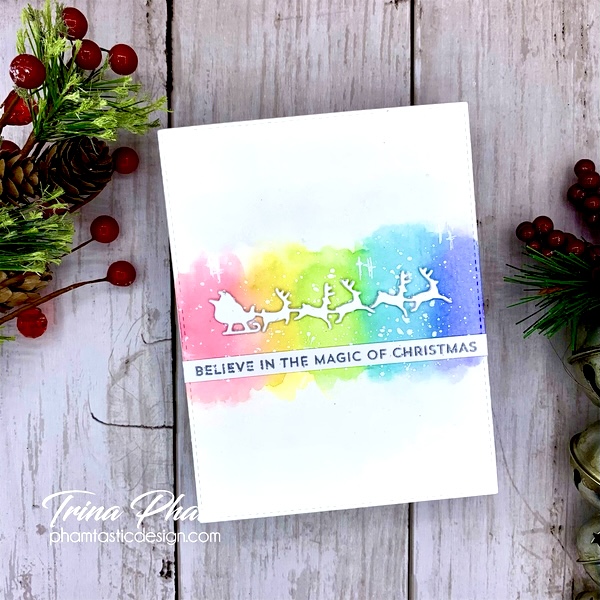
Here’s my super easy CAS card.


The watercolored rainbow background was created with Karin Brush Marker Pro using the wet-on-wet technique on a stitched watercolor panel from my stash.  The area was wet first with clean water, then I picked up the colours that were scribbled on a white board and added them in.  Splattered it with white gouache paint, then set aside to dry.


Next, Santa’s sleigh from Memory Box Cabin Snowglobe was die cut from Bristol paper several times and stacked for dimension.  The sentiment from My Favorite Things (MFT) Itty Bitty Holiday Wishes was then heat embossed with silver embossing powder on a strip of Bristol paper.  Assembled the card onto a white card base and added cross details with a white gel pen and clear shimmer to Santa to finish.


We have the wonderful Izzy (Izzy Scraps) as our guest this month.  She and the designers have made some beautiful rainbow cards to inspire you and you can check them out HERE.  The challenge ends on April 24th PST.  Hope to see your rainbow creations in the gallery.  Thank you for stopping by. 


Challenges:

September 03, 2020

CAS Christmas September Challenge - Christmas Tree

Hello and welcome to a new challenge at CAS Christmas.  The theme this month is Christmas Tree.


This is my third attempt in creating my card! *lol*😂   When I came across forgotten new NBUS Holiday Frames from Simon Says Stamp, the light bulb went off and things finally came together.


I dusted off my Gansai Tambi watercolor paints and created a background wash of blue and purple on a piece of Arches cold press watercolor paper.  Built up the colours by drying with my heat tool in between layers.  After that, new NBUS trees from Inkadinkado Woodland Wonderland were stamped with Versafine black ink.  Splattered the piece with white gouache paint for snow.  


Trimmed the panel down to the same size as the frame and adhered behind it.  Left the Christmas cutout letters in place then die cut them two more times and stacked for dimension.  Spritz the whole piece with a sparkle spray for some shimmer (doesn’t show in photo).  To give it more dimension, die cut the frame from regular A2 white cardstock and inked the left and bottom edges of the opening with gray dye ink.  Inlaid the framed image to finish.


Are you ready to play along?  We have Steph (My Paper Corner) as our guest this month.  As always, you can find more inspirations from her and the rest of the design team over on the challenge blog post HERE.  The challenge is open till September 24 PST.  Hope to see you in the gallery. Thank you for stopping by.


Challenges:
Merry Little Christmas - #28 September Anything Christmas Goes
NBUS #18 - new frame die and tree stamp


January 17, 2020

Guest Designer for Uniko Challenge #57

Happy Fri-yay everyone.  I’m excited to be guest designing for Uniko challenge #57 where it’s Anything Goes optional twist Cool Winter Colours.


The holiday may be over, but it’s still winter here as we got our first {and second and third} blast of snow this past week.  So with the optional twist of cool winter colours and a couple of new unused Uniko winter products, I created this clean and simple (CAS) card.


Stamped merry from Uniko Big and Bold - Merry with Archival black ink on a hot press watercolor panel.  Taped the panel to a hardboard to prevent warping when watercolouring.  Masked off the bottom of the panel using the sentiment as a guide.  Placed Uniko Let It Snow stencil on top and applied VersaMark ink with a sponge dauber.  Heat embossed the snowflakes with clear embossing powder.


Next, watercoloured the stripes using a flat brush in cool shades of green and blue distress inks (Cracked Pistachio, Mowed Lawn, Salty Ocean, Blueprint Sketch and Chipped Sapphire).  Repeated the process, drying in between each application with a heat tool, until the colours were more intense.  Wiped away any excess ink with a paper towel and added splatters using white gouache paint.  Removed tape and mask and re-stamped merry in VersaMark ink and heat embossed with white embossing powder.  It was offset for a shadow effect.  Stamped the ampersand and bright with black Archival ink.  Die cut the panel with a stitched rectangle.  Popped it onto a white card base with fun foam then spritz the entire card with a sparkle spray to finish.


For full details on the challenge, including prises, and to find more inspiration from the design team, click HERE.  Thank you for stopping by.  Have a wonderful weekend.


Challenges:
Merry Little Christmas - #18 January Anything Christmas Goes
CAS Watercolour - January 2020 Cool Colours
CAS Stencil - January 2020 Use a New Stencil
Cardz 4 Guyz - #236 Clean and Simple
SSS Wednesday - Use a Stencil

December 20, 2019

Die Cut Snippets Christmas

Hello everyone.  Popping in quickly to share a Christmas card made with leftover snippets from my stash.  There is no stamping and all dies are from Memory Box.

J

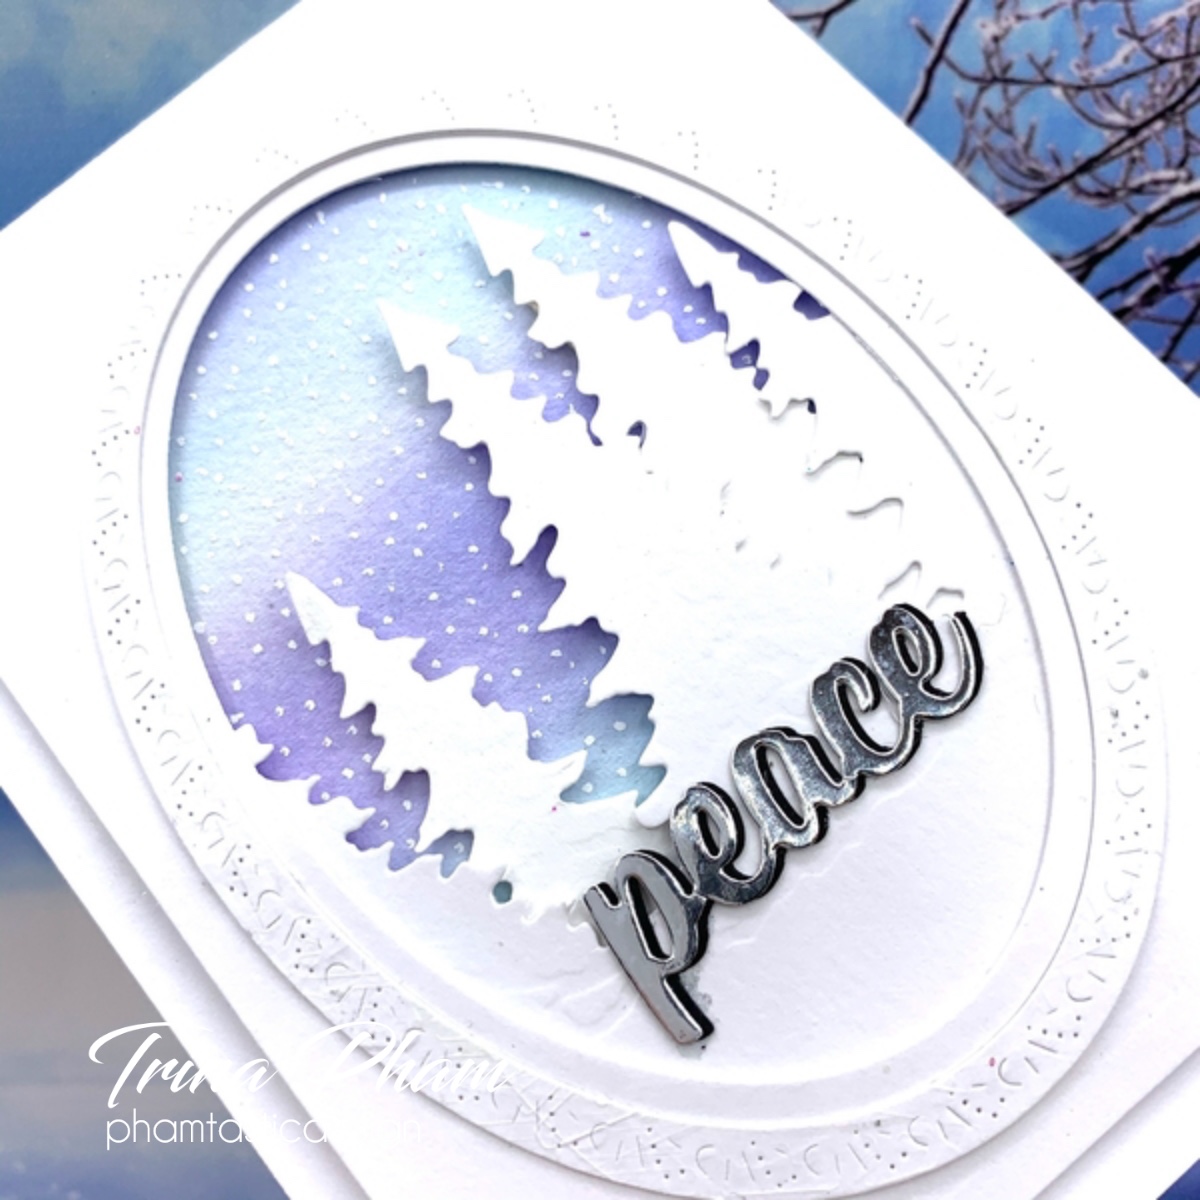
Took a Bristol panel with a circle die cut in the center from my stash and die cut over the circle opening with the Winter Tree Oval image die to create an oval aperture.  I wanted to use the oval frame left over from this Winter card.  The row of white trees were unused from this Northern Lights card when I thought black trees were more appropriate.


The watercolour background was one of my experimental pieces when playing around with the Raining Watercolors technique.  Just added snow to it with a white gel pen.  The silver foil peace sentiment was initially for this AI vellum card, but a blue foil sentiment edged it out.  Assembled onto a white top folding card base to finish.

Sadly, this amount of snippets from my stash didn’t even put a dent in it. 😆   Thank you for taking time out of your busy holiday season to visit.  Enjoy your holiday.


Challenges:
Uniko - #56 Christmas optional twist Tree
Addicted to CAS - #174 Tree
Pixie’s Snippets Playground - #367 Use Snippets
Papercraft - #52 Christmas
Dies R Us - #135 Anything Christmas
Inkspirational - #202 No Stamping
Try It Tuesday - Christmas is Coming
The Sisterrhoodd of Crafters - Anything Christmas


October 08, 2019

You Got This

Hello there.  I’m quickly sneaking in a CAS encagement card in support of breast cancer awareness.  I hope I never need to use it.


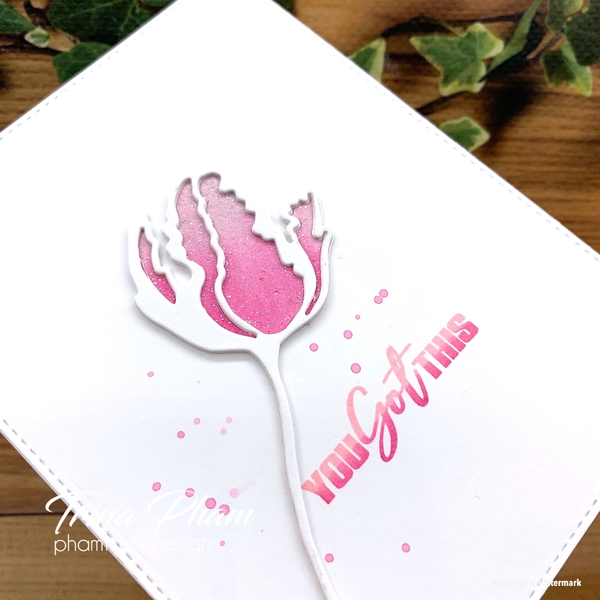
The sentiment was ombré inked with Spun Sugar and Picked Raspberry distress inks (di’s), then stamped onto a stitched Bristol panel from my stash.  Used my MISTI so it can be repeated a few times for a good impression.  Added Picked Raspberry di splatters to complete the background.


The Alexandra Renke tulip diecuts were from a crafty friend (thank you, Hideko).  Watercolored the inside pieces with the same di’s.  Inked them with VersaMark then heat embossed them with clear glitter embossing powder.  Took three of the outlines and stacked them onto the background panel.  Inlaid the watercoloured pieces to finish,


And that’s it... very simple.  Thank you for stopping by.


Challenges:
Time Out - #145 Breast Cancer Awareness
The Flower Challenge - #37 CAS
Uniko - #55 Anything Goes + optional twist Autumn   (breast cancer awareness month is in autumn)
Pixie’s Snippets Playground -  #362 Use Snippets