Showing posts with label thank you. Show all posts

November 16, 2024

Just A Note To Say

Hello there.  Taking a brief break from Christmas cards today to share a super easy thank you card that was commissioned for a piano teacher.

*affiliate links used in this post when possible at no extra cost to you*

The piano keys were created with strips of paper trimmed from black and white scraps.  The alcohol ink background is Inked Oasis pattern paper from Pink and Main.  


The Musical Notes (retired My Favorite Things) were die cut from black cardstock.  The sentiment (retired Poppy Stamps) was white heat embossed onto black cardstock.  Added the three dots with a white gel pen and stamped “thank you” on the inside (forgot to take a photo of it).  Assembled the card onto a split black/white card base to finish. 


And that is all for this card!  Thank you for stopping by.  


June 23, 2021

Simple Thanks

Hello everyone.  Crafty friends are the best!  My card I’m sharing today is to thank my amazing crafty friends who sent their condolences when my dad passed away at the end of April.  It really helped a lot during a difficult time.  So after finding out from Mr. Google that peach colour represents gratitude, I made this super easy clean and simple (CAS) card.


The rose from a new die set called Bouquet Accessories by Hero Arts (HA) was die cut from blush cardstock (retired) and coloured/shaded with Copic markers.  The Simon Says Stamp (SSS) Script Thanks Shadow  was die cut twice from Bristol paper and once from silver foil paper then stacked for dimension. 


Assembled them onto a stitched Bristol panel from my stash.  Added shading below the rose with gray Copic markers to ground it.  Clear shimmer on the rose for a bit of sparkle to finish.


And that’s it!  Super easy and CAS.  Thank you for dropping by.


Challenges:
SSS Flickr Challenge - #178 Anything Goes (SSSFlickrchallenge#178 - used SSS Script Thanks) 

April 10, 2021

Spellbinders April Small Die of the Month

Hello there.  I’m popping in today to share a thank you card made with the April Spellbinders Small Die of the Month.  This month is called Stitched Thanks and consists of seven dies - one large main die with the stitching holes and six letters to spell “thanks”.  It’s perfectly sized for a slimline card.

I have wanted to give stitching a try for a couple of years now and even bought the supplies back then.  Sadly, they have been collecting dust ever since. 🙈   So when I couldn’t find or remember where I kept them, I was so bummed.  I thought about buying the supplies again, but this die set can be used with or without stitching.  But as luck would have it, I found them last night just as I was about to post!  Here’s my card.


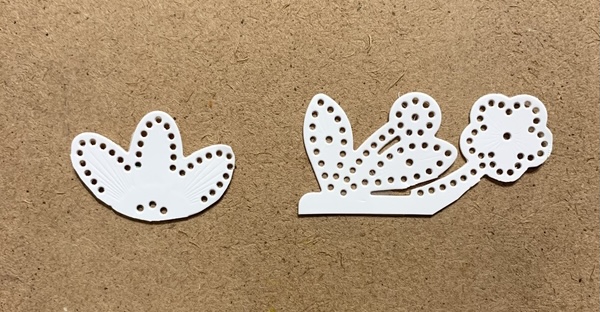
Being this is my first time stitching, I felt stitching the full die (which is gorgeous btw) would be a bit daunting.  So I went in a completely different direction, taking different parts and created stitched embellishment pieces for my card.


4 pieces of the one on the left above were overlapped and the holes aligned to form the large blue flower.  The piece on the right created the purple flower. 


This is a mini slimline card; another first for me.  A piece of Bristol paper was trimmed to 6”x3”.  The top and bottom were dry embossed with the large main die to give it some texture.  The letters were die cut from black cardstock and silver foil paper and offset for a shadow effect.  Assembled the card onto a 6”x3” white card base and added glitter enamel dots from Your Next Stamp Enchanted Garden Sparkly Gumdrops to finish.


The Small Die of the Month is one of many monthly club kits offered by Spellbinders.  To see the other monthly clubs, click HERE.  For certain available past club kits, click HERE.  Thank you for stopping by.  Have a great day.


February 07, 2021

Spellbinders February 2021 Small Die of the Month

Hello there!  I’m back today to share a simple card made with the February Spellbinders 2021 Small Die of the Month Club Kit (SDOM).  This month is Trefoil Tile & Panel Card Creator die set contains 10 dies.  Trefoil is a graphic form composed of three overlapping shapes.

PLEASE NOTE: Affiliate links have been used when possible.
at no extra cost to you when you purchase through these links.


My poor dad has been in the hospital and will probably be there for a while still (thankfully it’s not covid).  The nurses and doctors are working hard to care for him, so a thank you card from my family was in order.


I went with a classic black, white and gold colour palette.  Started by die cutting the panel die from Bristol paper.  Backed it with black cardstock that was trimmed to the same size.


The word tile dies were die cut from gold foil cardstock.  The pattern tile die with the butterfly was die cut from Bristol paper. The butterfly portion was then die cut three times from gold foil cardstock and fussy cut out to use as embellishments.  Adhered the trefoil panel off the edge at an angle onto textured cardstock then mounted onto a white card base to finish.


This month’s SDOM Kit coordinates with this month’s Clear Stamp of the Month Club Kit.  Get both kits for even more possibilities.  To see all the other monthly subscriptions Spellbinders offers, click HERE.  Some past kits are also available HERE.  Thank you for stopping by.  Have a wonderful week.


Challenges:
NBUS #23 - all new dies


July 10, 2019

Memory Box DT Post - Stripes

Hello everyone.  I'm over on the Memory Box blog with a thank you card set inspired by this month’s Stripes challenge.  To check out the details, click HERE.


Challenges:

Pixie’s Snippets Playground - #356 Use Snippets
Creative with Stamps - #40 Stripes


Thank you for dropping in.  Have a great day!

February 08, 2019

Special Twofers

Hello there!  Today I am sharing a couple of floral cards made with my latest floral purchase from Honey Bee Stamps.  The set is called Winter Anemones.  First up is a thank you card.  Darnell is hosting a special blog hop for the wonderful Di who has run Pixie's Snippets Playground for the past seven years.  When I started blogging in 2016, Di was the very firs person to send me a personal e-mail to welcome me and give me tips.  I was overwhelmed and if it weren't for her, I don't know if I'd still be here.  Thank you so much, Di!  Here's the card I made for her.


Took a stitched panel die cut from X-press It cardstock from my stash and stamped the largest image in the upper right corner with Copic friendly black ink.  Masked it, then sponged Daffodil Delight dye ink around it.  


Placed a grid stencil (retired) over top and added more Daffodil Delight with a Clarity Brush through the stencil.  Removed the mask and coloured the image with Copics.  Thanks (a freebie included with one of my Winnie & Walter order) was die cut from a scrap of diy black glitter paper.  I thought it would be fun to mount it at a slant off the edge.  Okay, caught me... I smeared ink on the left edge and didn't want to start all over again. 😂  Clear shimmer added to the flowers finished off the card.


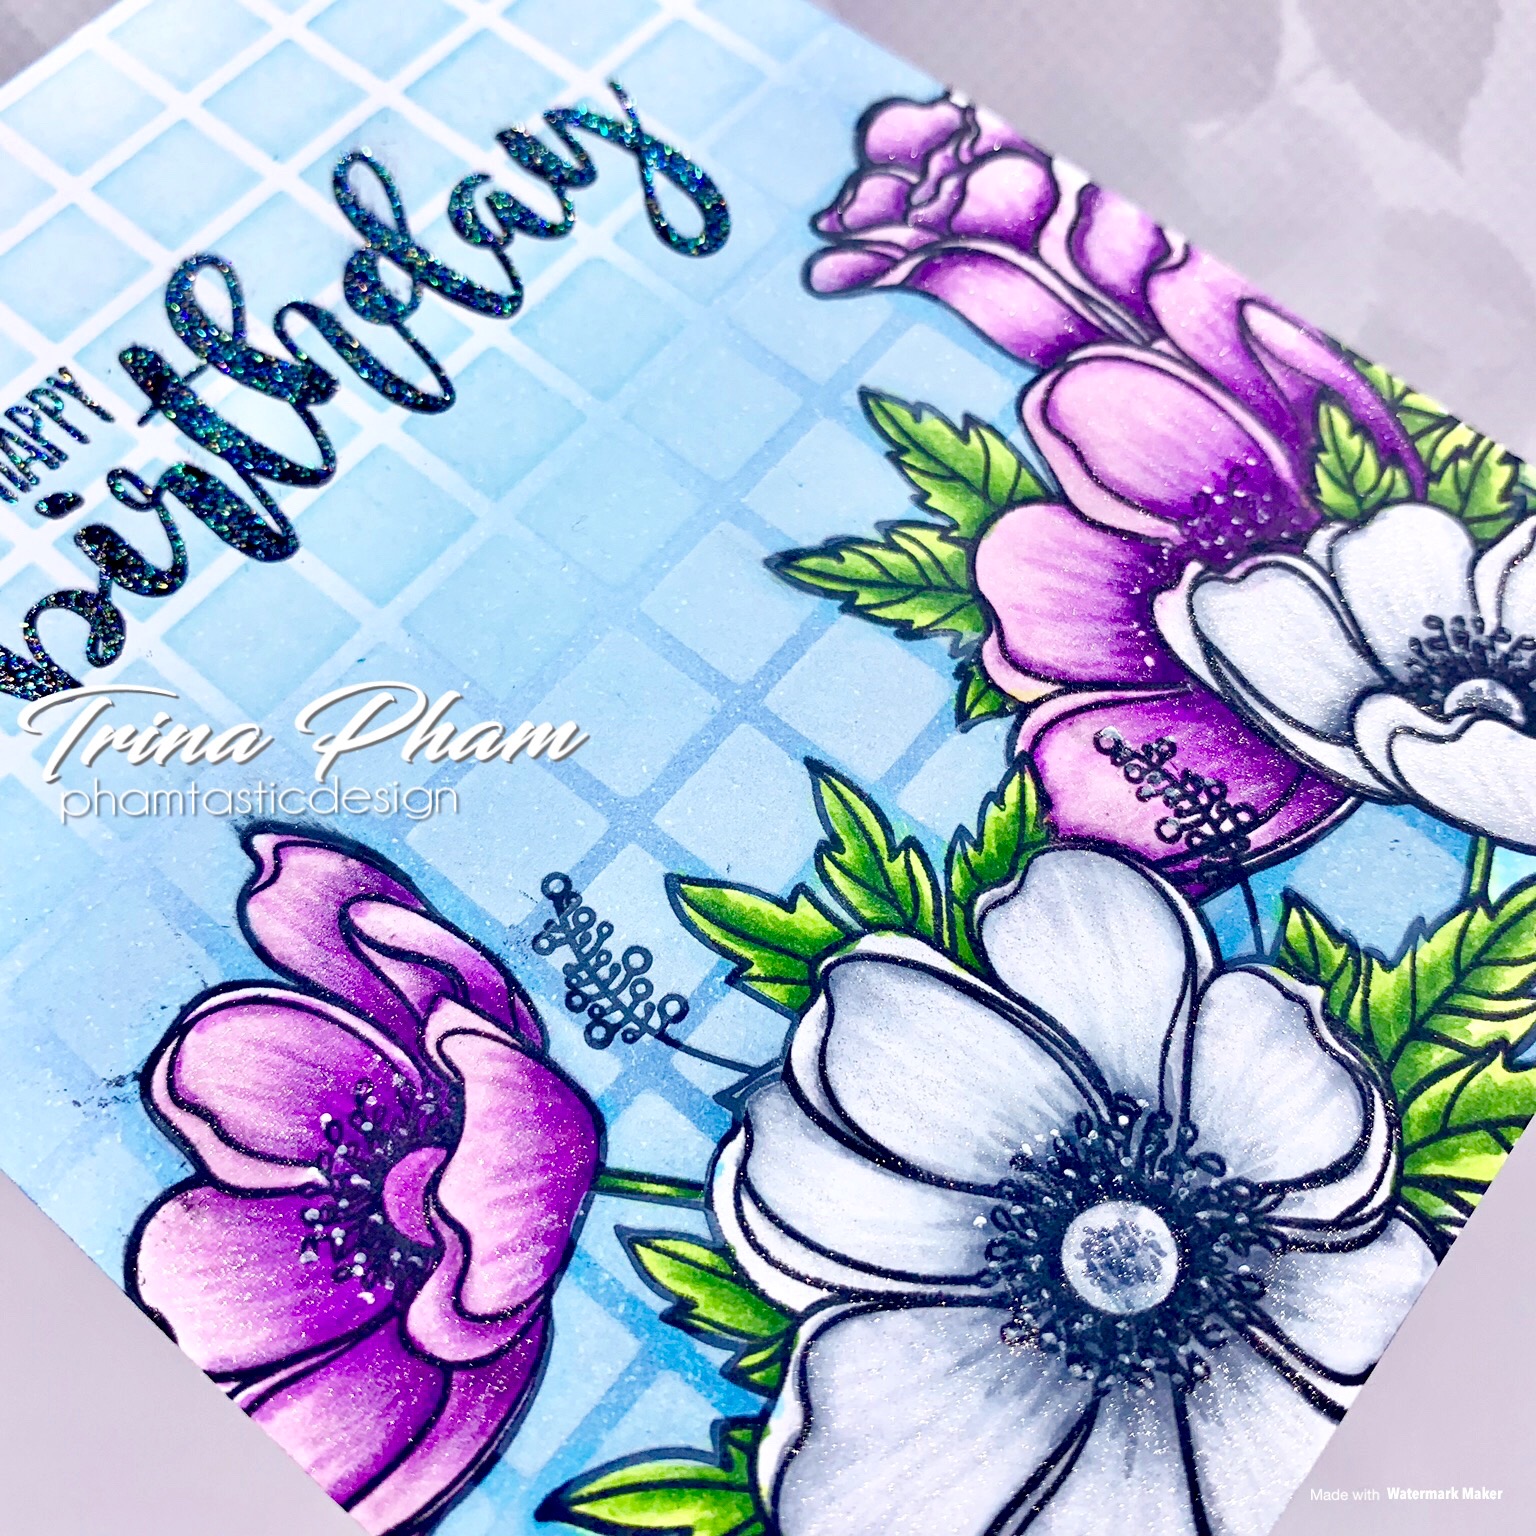
My next card is a birthday card for my friend, Dorothy, whose birthday is today!  Happy birthday, Dorothy!  It was created similarly to the first one.


Stamped largest image with Copic friendly ink on the bottom of an X-press it panel, masked, then stamped the second largest image.  Masked then blended Faded Jeans distress ink around the image.  I wasn't happy at how dark it looked and liked the grid stencil, so placed the stencil over top again and sponged white pigment ink thought the stencil.


The upper part of the panel, Tumbled Glass distress ink was blended through the stencil  Removed masks and coloured in with Copics.  Black heat embossed the sentiment with clear glitter embossing powder.   Added clear shimmer to the flowers once again to finish.

And here they are.,, similar but different.


Thank you for dropping by.  Have a wonderful weekend.


Challenges:

Thanks card:
Pixie's Snippets Playground - Challenge #345

Birthday card:
Uniko - 7th Birthday Linky Party

Both cards:
The Flower Challenge - #29 Use your latest stamp/die
Watercooler Wednesday - #207 Helen's Feminine Anything Goes
Love to Craft - February Anything Goes
Addicted to Stamps and More - #327 Make Your Mark


December 21, 2018

Winnie & Walter More November 2018 New Release

Hello everyone!  I am delighted to be back on the Winnie and Walter blog today sharing more creations using the new products from their November Release!


HEARTFELT THANKS

I wanted to start off by thanking Shay for having me join in the release, so I created a CAS thank you card using In a Word: Thanks (the stamp set).


Stamped the outline thanks with Copic friendly black ink on an A2 size X-press It piece of cardstock and coloured in with red Copic markers.


The hearts from Scenery: Seeing Hearts were heat embossed with clear embossing powder.  Abandoned Coral and Candied Apple distress inks were then blended over top for an ombré look.  Wiped off excess ink with a tissue.  Heartfelt from Sentimental: Thanks was white heat embossed on a black strip.  This set was free with qualifying orders during Black Friday/Cyber Monday sale, and will be available for purchase in the future.  For added dimension, Crystal Glaze was added as the finishing touch.


Since there are coordinating In a Word: Thanks cutaways, I created a second CAS thank you card with it.


Thanks was die cut twice: one from black and the other from pearlescent white cardstock.  They were offset for a shadow effect which helps to make it stand out.  Once again, the sentiment from Sentimental: Thanks was white heat embossed on a black strip.


Next a reverse heart mask was die cut from masking paper using True Dotty Heart cutaways.  Placed the mask off the edge of a regular white A2 panel, then blended Picked Raspberry, Wilted Violet and Salty Ocean distress inks.  For some sparkle, spritz with a DIY shimmer spray of Perfect Pearls and water.  Removed the mask and added a few clear sparkly sequins to finish.


JOLLY SANTA

When I saw In a Word; Jolly cutaway, I thought of Santa!  I know, it's a bit of a stretch. 😂


Instead of having Santa replace the "o", I thought it would be fun to have him stepping out of the Jolly cut out.  Started by stamping Santa from Snowy Holidays with Evelin T Designs with Copic friendly black ink.  Coloured him with Copics, then die cut out with the matching cutaway.


A scallop panel was then die cut from Bristol paper using Essentials: Audrey Cutaways.  Jolly was die cut from that then popped up with foam adhesive over some silver glitter paper on a white card base.  Holidays from In a Word: Happy (the stamp set) was white heat embossed on black.  Some silver splatters finished off the card.


BOKEH WONDER

In keeping with the magic and wonder of the season, I thought a bokeh background would be suitable.  Rooted in photography, bokeh is the blurred or out-of-focus areas of an image.  I've done this background before using circle stencils and white pigment ink, but I thought I would try achieving the effect with the VersaMark Resist/ghosting technique.  Not sure I succeeded, but it was easy and fun to do.


Paper that does not absorb ink easily is best for this technique.  Glossy cardstock works, but I had some coated cardstcok given to me from my freind Christine and that was what I used.  I started by randomly stamping the images from Secenery: Dotty in several sizes with VersaMark ink.  Allowed it to dry before applying distress inks (di) in rainbow colours with a mini blending tool.  The VersaMark ink resisted the colours, leaving varied light areas.  I may have gotten a little carried away with the amount of images I stamped. 😂   Excess ink was wiped off with a tissue.


Season's from Winter Woodland was heat embossed with white embossing powder on a vellum strip.  In a Word: Wonder cutaway was die cut from white glitter paper and adhered to the vellum.  Instead of die cutting a shadow piece, a grey Copic marker was used to add the shadow on the vellum from the backside.  Stamped, Copic coloured and die cut the ballerina from Nutcracker Kisses with Evelin T Designs to finish.


The background was not only easy, but effective, so I created two more cards.  I used the sentiments from In a Word: Grand Merry.  On this first card, I tried it without the vellum.


I think it looks better with vellum.  So on this final card, I added the vellum back.  I also changed up the design, and took the smaller rectangle from Essentials: Katharine Cutaways and die cut form the panel then matted it to white cardstock, leaving a 1/8" white border.  Stamped, Copic coloured and die cut the yetis from Yetitide Greetings with Evelin T Designs to finish.


This post was a bit longer than I had intended, but good news is you've reached the end!  Thank you for taking the time to visit, especially during this busy time of year and with Christmas only four days away!  Wishing you all a safe and joyous holiday season!


Challenges:

Thanks Cards
That's Crafty - Anything Goes
Love to Craft - #29 December Anything Goes

Santa Card
Creative with Stamps - #33 Santa or Gfft


Bokeh Cards
Watercooler Wednesday - #201 Marsha's Special Two Week Year-End Anything Goes
Merry Little Christmas - #5 December Anything Christmas Goes
Addicted to Stamps - #169 Christmas Non Traditional Colours
Christmas Crafts All Year Round - December Anything Goes